Beginner's Guide & Tips
Enter the Gungeon is deep but has a steep learning curve — this beginner's guide covers core concepts, character picks, resource management, exploration, and combat tips.

Enter the Gungeon is a rich and rewarding game, but it can feel overwhelming at the start. This guide introduces some key concepts to help your runs go more smoothly.
The sections below follow the order introduction → goals → recommended characters → core concepts → exploration → combat. The first three cover what to know before a run starts; the last three cover the decisions you make once you are inside the Gungeon.
Introduction
The sheer variety of Guns, Items, and mechanics means every run feels fresh. The game is also packed with references and Easter eggs, and when a strong item synergy comes together, the payoff of bulldozing through room after room is genuinely satisfying.
The game rarely explains its mechanics directly, though. You are expected to gather information, test ideas, and learn through trial and error — that is part of the charm, and also why the early hours can be frustrating.
While luck does play a role, what really shapes your experience is the knowledge you build up: the more you understand the mechanics, enemy patterns, and item effects, the more consistent your decisions become. So you do not have to aim for the credits right away — focus on slowly unlocking NPCs, shops, useful Guns, and Items to lower the overall difficulty, and places that once seemed brutal gradually become easy.
Goals
You don't actually have to rush to beat the game — playing casually and having fun is perfectly fine. That said, a beginner with no direction at all may not know what to do next.
So I'd suggest treating "unlocking content" as your main early goal. As NPCs, Items, Guns, and special modes gradually open up, the game becomes richer and every run gains more variety (for a full list of everything you can unlock, see  All Unlocks Guide: Characters, Guns & Items).
If you don't have a clear goal at the start, use the milestones below as stepping stones to work toward at your own pace:
- Rescue all NPCs (see
 All NPCs & Merchants Guide)
 - Clear the fifth floor (the Forge) and finish the normal ending
- Gather the materials to craft the Bullet That Can Kill The Past
- Kill the past of the four starting characters to unlock their true endings
- Complete the
 Ox arm delivery sidequest
 - Complete
 Frifle and the Grey Mauser's Hunting Quests
 - Challenge the hidden floors (see
 Secret Floors Guide (Hidden Chambers))
 - Unlock the secret characters (The
 Robot,
  Bullet, The
  Paradox)
 - Clear the game as The Robot or Bullet to unlock their true endings
- Clear as The Paradox to unlock The
 Gunslinger, then clear as The Gunslinger for the true ending
 - Repair every floor elevator to unlock Boss Rush mode
- Try the special modes (Cursed Mode, Turbo Mode, Blessed Mode, Challenge Mode, Boss Rush — see
 Special Game Modes Guide (Turbo, Rainbow, Blessed & More))
 - Unlock all Items and Guns in the game
Recommended Characters
At the start of a run you can pick from different characters, each with their own starting weapon, item, and traits.
For beginners, the differences are more than just feel — they affect your early margin for error and how you gather resources. If you're not yet used to enemy attack patterns, start with a stable, forgiving character to get a feel for the game's rhythm.
Below is a quick rundown of the four base characters, followed by the picks best suited to newcomers.
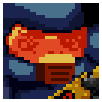 Marine: starts with one extra
  Armor and above-average accuracy; the
  Military Training passive improves accuracy, reload, and charge speed, and the
  Supply Drop active drops an ammo crate at your feet to top up your held gun
 Pilot: a passive gives 15% off at every shop, +10% ammo capacity, and an extra active-item slot (can carry two active items at once); the
  Trusty Lockpicks active has a 50% chance to open a locked chest without a
  Key (on failure the lock is permanently ruined, but the chest can still be shot open)
 Convict: starts with two guns — the
  Budget Revolver plus the close-range
  Sawed-Off — the
  Enraging Photo passive doubles her damage for 4 seconds after she takes a hit, and her active item is a
  Molotov
 Hunter: starts with a
  Crossbow that one-shots fodder enemies like
 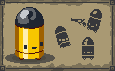 Bullet Kin, plus a backup
  Rusty Sidearm, and a
  Dog companion (chance to dig up loot after clearing a room, barks to warn you about
  Mimics)
For beginners, the Marine and Hunter are especially recommended. The Marine's Armor adds a safety buffer and the passive lets you deal damage from a safer range. The Hunter starts with two weapons and the dog provides extra item drops, both of which increase your margin for error. For a fuller breakdown of every character and how to unlock them, see  All Characters Guide: Starting Loadouts & Traits.
Core Concepts
The game looks like it is all about execution, but what usually decides how far you get is whether you understand what resources are worth, how rewards are generated, and what to save for a moment that matters more. The concepts below are the ones you meet earliest and that most affect how consistently you clear floors.
Blanks
 Blanks clear all bullets currently on screen, making them a vital survival resource. Your Blank supply resets to two every time you descend to a new floor, so if you have any left after a boss, use them to hunt for secret rooms.
Master Round
Defeating a floor boss without taking damage earns a  Master Round, which permanently increases your maximum health by one heart. This is extremely valuable for long-term survivability.
Resource management
Resource management is crucial in this game. Often it's not that you can't beat an enemy — it's that you spent key resources too early and had nothing left for a boss or a dangerous room later on.
So build a habit early on: don't use a resource the moment you see it, and don't spend at every shop or chest right away. First check what rooms the floor has and what you're short on, then decide how to allocate — it's usually much steadier.
We'll break this down into Blanks, weapon ammo,  Casings, and Keys.
Blanks and Ammo
Because a damageless boss kill earns a Master Round, save high-DPS weapon ammo and Blanks to increase your chance of a perfect clear. Your starting pistol has poor range, damage, and accuracy, but you'll often need to conserve better weapon ammo for the boss — get comfortable using it.
Casings
Casings (currency) are limited. Explore every room on a floor before spending, so you don't blow your budget on something you'll regret after finding a better option.
Keys
Keys are also limited — chests and certain rooms both need them. Explore the whole floor first, then decide where to spend. Always keep at least one Key on hand; running out when a good fused chest appears means watching it explode.
Exploration Tips
Beyond combat, exploration is a major factor in how consistently you clear runs. Each floor has limited resources, and you'll constantly weigh chests, shops, secret rooms, NPC events, and various rooms against each other. When to open a chest, when to save a Key, when to buy — these calls directly affect how hard the later floors are.
So exploring isn't just about clearing every room. It's about learning to judge what resources a floor offers, which ones you need most right now, and which can be left until last.
We'll start with chests — the biggest factor in resource allocation — then cover secret rooms, shops, and what to check before descending.
Chests
Chests are one of the main resource sources on each floor, potentially offering Guns, active items, passive items, and even defining your whole build. But Keys are usually limited, so you don't have to open every chest you see. Learn the chest types, qualities, and risks first, then decide whether they're worth a Key. For the full rules on every chest type, see  Chest Guide (Qualities & Mimics).
Treasure Rooms
Every floor has exactly two treasure rooms — one always contains a gun, the other always contains an active or passive item.
Chest Quality
Chest Quality tiers from highest to lowest: Rainbow Chest > Black Chest > Red Chest > Green Chest > Blue Chest > Brown Chest. Higher Quality chests are more likely to contain powerful guns or items.
Destroying Chests
After clearing a floor, you can shoot unwanted locked chests to destroy them. Most drop  Junk you can sell, but occasionally you'll get a half-heart or something more valuable. Stay at a distance — destroyed chests can explode.
Mimics
Always shoot a chest once with your starting gun before opening it. If you don't, a Mimic will attack you — losing health is bad, but wasting a Key is worse.
Fused Chests
Some chests spawn with a lit fuse. Open it quickly or douse the fuse with a water-type gun or item, otherwise the chest explodes and the contents are lost.
Secret Rooms
Almost every floor has at least one secret room, entered by using a Blank against the wall. There are three common ways to detect them:
- Shoot the wall with an ammo-consuming gun — if the wall cracks, there's a secret room
- Walk toward a wall; if your character breaks into a run, a room is behind it
- Maps, certain items, or synergies can directly reveal secret room locations
Secret rooms most often appear adjacent to treasure rooms, NPC rooms, shops, and dead-end corridors. Be careful about test-firing at a shop wall — the cost is covered in the Shop section below.
Each floor randomly spawns 0–2 secret rooms, so they aren't guaranteed, and they don't always contain something useful. Don't spend too much time hunting for them — if you have spare Blanks, try the common spots and move on. For more on secret room locations and detection tricks, see  How to Find Secret Rooms.
Shop
Besides chests and secret rooms, the shop is an important resupply point on each floor, reliably offering Keys, healing, Blanks, Guns, or Items. Prices aren't always cheap, but since you can see exactly what's on offer, it's easier to judge than gambling on a chest. And because Casings are limited, explore the whole floor first, then come back to decide what to buy — that way you won't run out of money before finding something you need more.
Beyond buying normally, shop items can also be stolen or robbed, and the two approaches carry different conditions and risks.
Stealing
Shop items can be stolen using an active item that grants invisibility —  Smoke Bomb,
  Decoy,
  Chaff Grenade,
  Box, and others. Some guns also trigger invisibility after emptying a full magazine, which works the same way. You can only steal once per shop; a second attempt fails and angers the shopkeeper into refusing to sell.
Robbing
Items priced at 9999 can be grabbed by force. Click the item, let the shopkeeper tell you your wallet's too light, then open fire until the shopkeeper shoots back and leaves — the 9999 item stays behind. See  How to Steal from Shops for details.
Floor Checklist Before Descending
Once you descend you can't go back, so before leaving each floor do a quick check that you've grabbed its resources, interacted with its NPCs, and dealt with its chests.
This step seems tedious, but it matters a lot for beginners. Often you don't lose because the next floor is too hard, but because you skipped a key purchase, forgot a chest, or didn't claim an NPC reward on the previous floor and ran short later.
Build the habit of not rushing downstairs right after a boss — sweep the whole floor map first, then decide whether to descend.
- Check the shop for anything worth buying
- Interact with all NPCs (claim map completion rewards, unplayed minigames, unbought stock…)
- If you have spare Blanks, try common secret room spots
- Open or destroy any remaining chests for resources
- If you have plenty of Casings, buying resources here is cheaper than on the next floor
Combat Tips
Combat isn't about rolling the moment you see a bullet — consistent clears come from reading enemies, keeping distance, using cover, and switching guns at the right time. The full combat and dodge-roll guide now lives in  Combat Tips & Dodge Roll Guide, covering:
- Using the right gun for the situation
- Cover, movement, and spacing fundamentals
- Dodge-roll mechanics, choosing a direction, and what you can still do mid-roll (including Blanks and the table roll)
- Click-to-fire faster, pit kills, and explosion bullet-clearing